


A Head of Its Time: From Clay to Print to Exhibit
Before learning anything about 3D software and printers, I started with sculpting clay. The entire process has embedded strong fundamental skills such as understanding a 3D space, how to approach complex shapes, and how to reverse-engineer a sculpt. Creating a diver sculpture was a perfect project that fulfilled the above while pulling from previous inspirations.
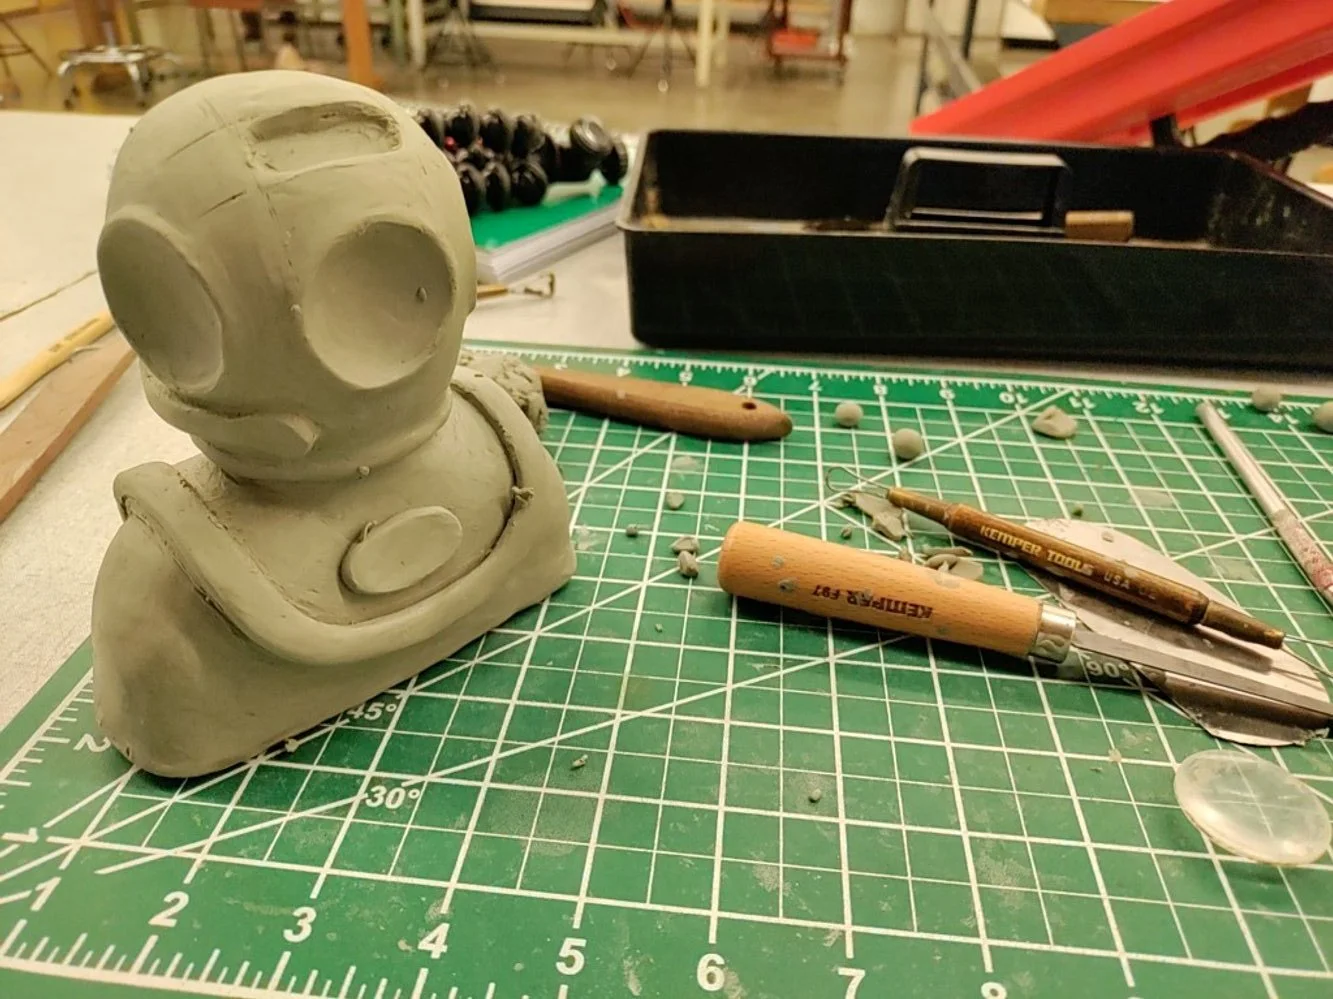
Sculpting with Clay
How can I go from a brick of clay into a diver’s helmet? Our first step was to break the bust down into simple shapes like circles and cylinders. Another helpful tip is using a familiar item as a reference point.
The shoulders and neck is just half of a cylinder. The head is just a circle. The breast plate was a little tough, but I modeled it after a horse saddle and a Pringle chip.
After connecting the three pieces, I can then start to hash out primary details: like how the head curves towards the neck into a rim, or the raised portion of breast plate, lowering the corners of the body to make the shoulders.
As I approached finer details, I knew that I would need to continue building it in a 3D space.
Scanning the sculpt to make a 3D Mesh
Using an EinScan SP Scanner, we were able to scan in the clay sculpture into a 3D Mesh. Once the scan was complete, I saved multiple instances of the same 3D file. One High resolution original, one medium format, and one small for sharing.
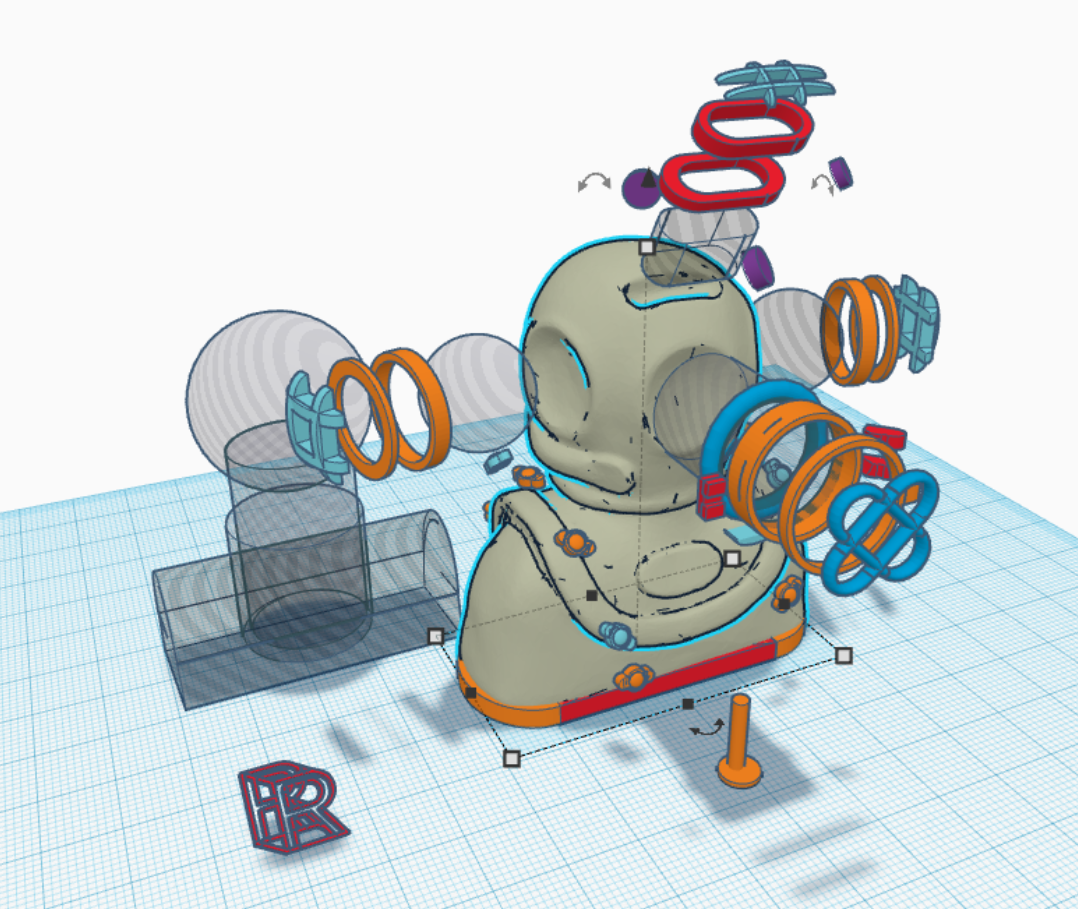
Post-Scan edits with TinkerCad
The rest of the work was finished in AutoDesk Tinkercad. The details in the helmet exhibit a lot of symmetry that can be completed and repeated faster in a virtual 3D space. The special boolean or “hole” tools also make hollowing out the model much easier. If you notice, the greyed out shapes in the picture are the shapes I’m using to make the model hollow. It’s comprised of the same basic shapes I mentioned earlier above.
Similar to our initial step, interpreting details into basic familiar shapes. Side porthole guards are a # “pound sign”, rivets on the breast plate are circles with half circles at either end. The iconic front porthole guard is a hollowed out oval, duplicated and flipped 45° to mirror it.
This is also my time to set up the model to be printed easily.
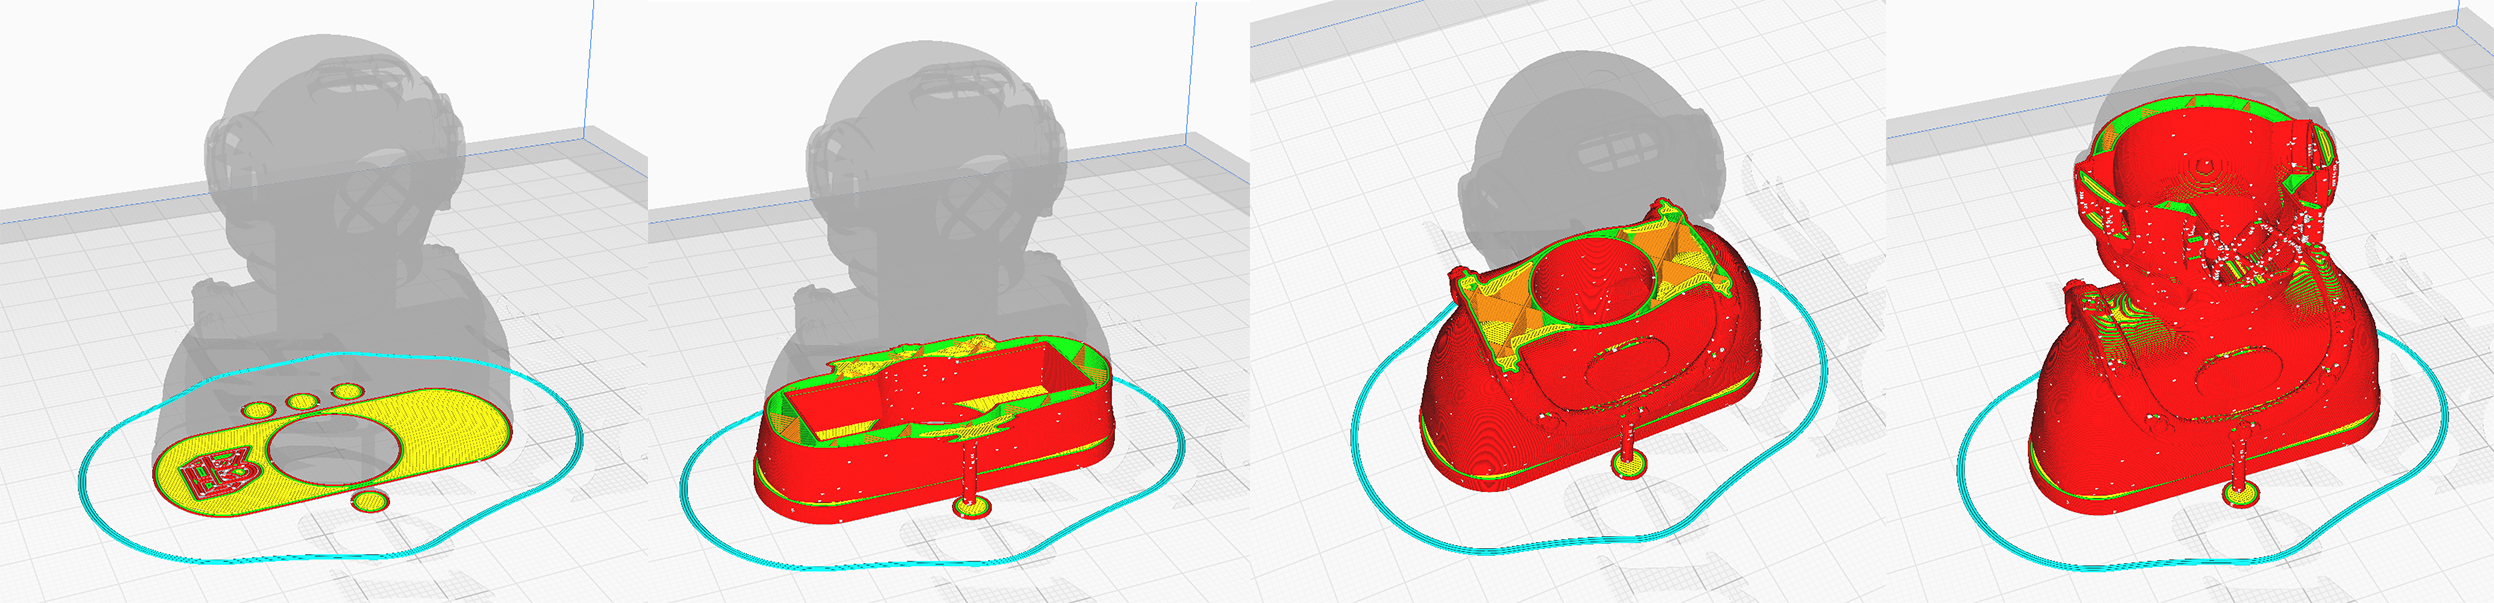
Slicing and Printing
Slicing is the process of turning a 3D file into a series of code as instructions for the printer to follow. Using CURA slicing software, I can modify the print settings and envision how the print job will be done. If I see any obstacles, I can jump right back into my 3D software and edit the model to improve the print quality. Since this is a night light, I want to print it as thin as possible with only a little infill for integrity. The print can be done with no additional supports or adhesion.


My First Retail Product
Without any advertising aside from friends on Instagram, I have managed to sell over $1,000 of these prints in the span of two months! Currently, my prints have been shipped to multiple states; even as far as Florida. They are also aboard two boats that travel the world!
Small & local sales of this continue; the release of these helmets to be sold online will be available soon. I'm quickly finding there is more to making a product than just the item itself. In the coming months, I’m focusing on creating sustainable shipping practices in tandem with making batches available to dealers & shops.
If you are interested in purchasing a nightlight, send me an email at info@reefrenders.com

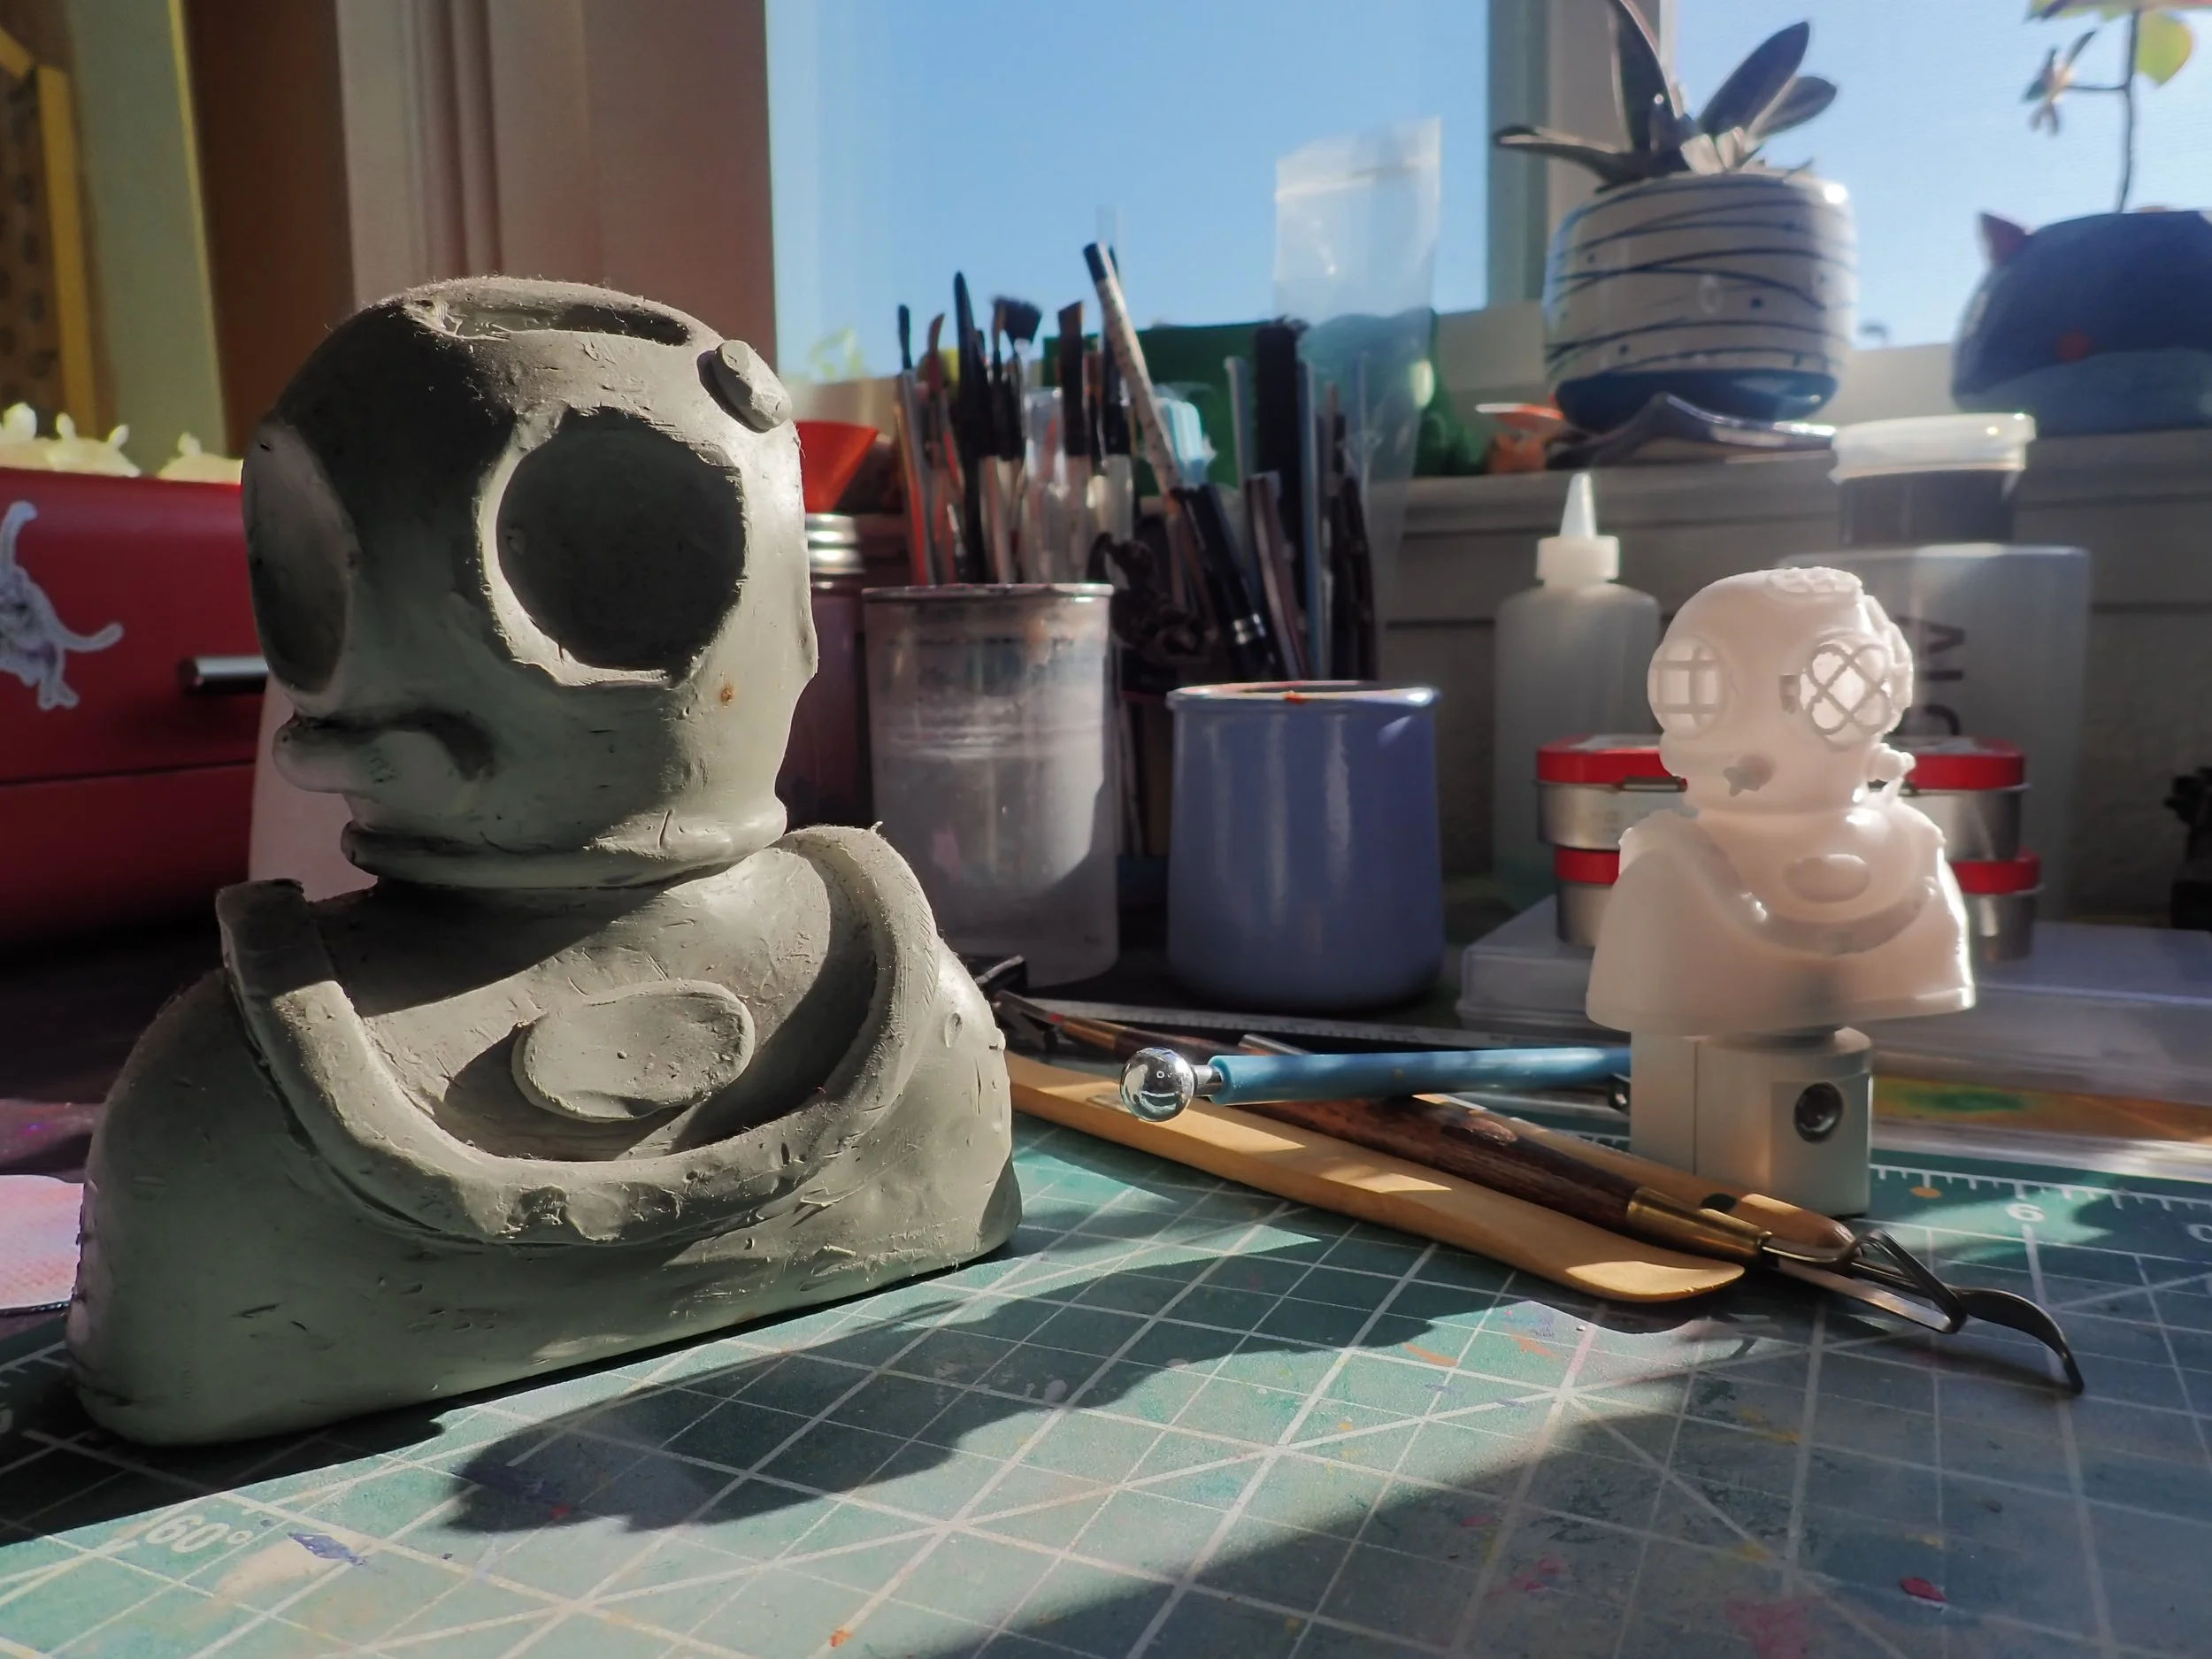
Taking It Further Into Education
There was a recent art show centered around the theme of time. As a stand alone piece, it makes no sense to enter my nightlight, but when paired with an earlier helmet from the past and comparing the two; it now fits the exhibit and serves another purpose.
Because I have the original scan, that means I also have a base model to edit off of. In this case I was able to create an entirely new helmet (left) without having to start all over again. As this project progress, I hope to create a whole timeline of helmets where guests can walk along and learn about the different diving helmets throughout history.
Discussion and summary
Since this project, I unfortunately do not do as much physical sculpting as I should be doing. Nowadays a majority of my work is in Blender, Maya or Zbrush. I prefer doing digital sculpting because of the specialized tools in each program allowing me to make creations a lot faster than if I was clay sculpting. Especially programs like Zbrush where it really feels like working with clay. Truth be told I’m addicted to the crutch of Ctrl+z.
I’m really proud of this project for multiple reasons. The main on being that printing a dome is not easy, let alone printing one without supports. Who knew that I’d include overhang thresholds in my basic learning.
After taking a step back I saw it was a cool coincidence that the medium of each diver would be nightlights. I immediately saw it as those who have “lit” the way and pioneered the field of SCUBA diving.
Looking back, there are a couple more things I can do, especially now that I know a lot more. I can use a dynamesh tool to make the body of the bust seamless to the base plate of the print. I could also add more girth to the guard rails of the front port hole. When looking in CURA, I can see a lot of white dots on the front porthole guard. This indicates that the filament there will be thin and scraggly.